Tencel Loose Knit Top
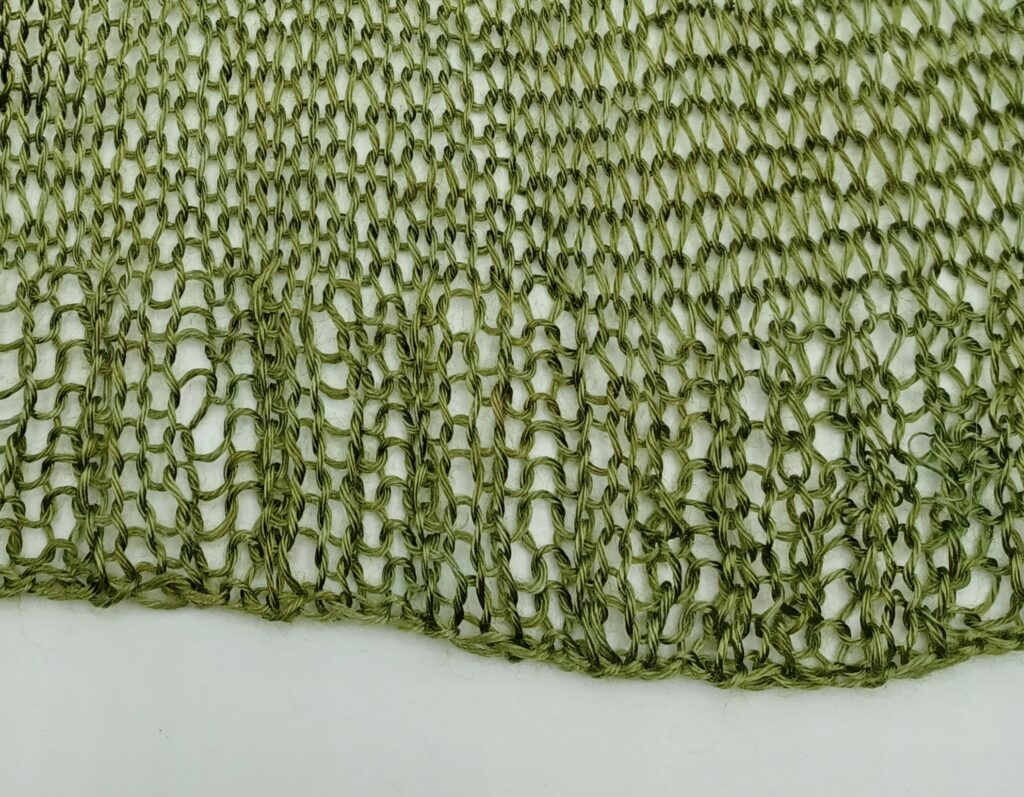
This top is constructed using 4ply/ fingering weight yarn with 6mm straight needles to give a more open weave, because we use oversize needles the top works up very quickly and uses relatively little yarn.
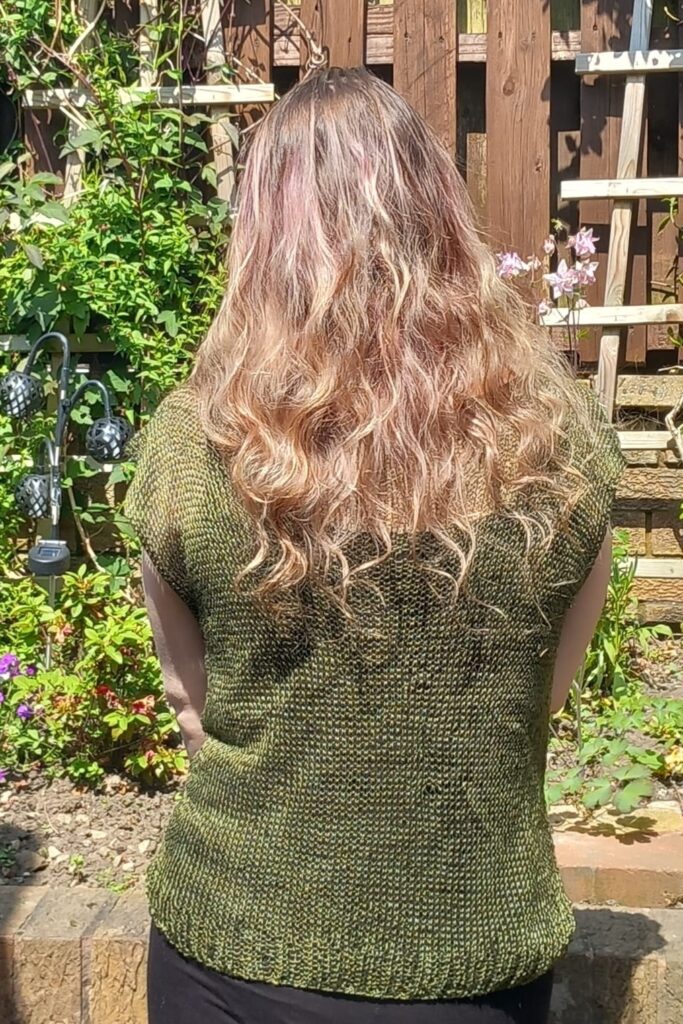
The top is knit from the front hem upwards, you then create the neck hole and knit down the back to the bottom, a small amount of sewing on the sides is required.
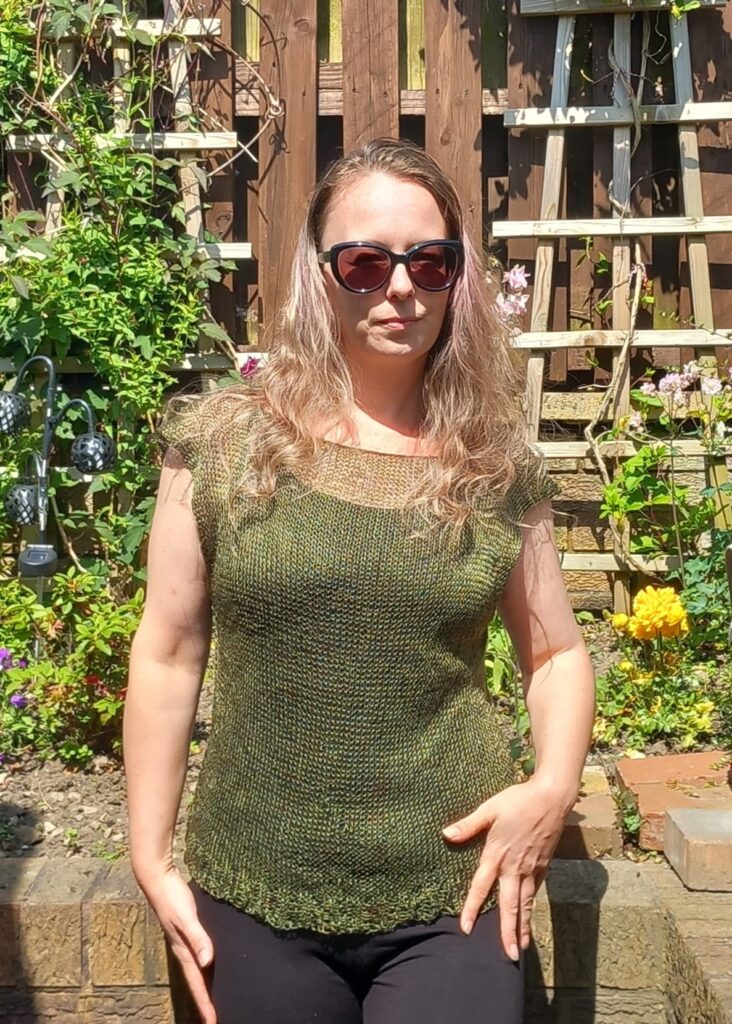
Model wears a size UK 10/12 and casted on 88 stitches using just under 100g of yarn.
You will need
4ply/ fingering weight yarn (amount will vary depending on size)
6mm needles
Blunt needle for sewing up
To work out your size…
This pattern can be made to fit any size, however has not been tested on other sizes so we cannot say how much yarn you would need for a different size. The example in the photo was made with 88 cast on stitches and used 100g of yarn. The amount you need will depend on how wide and how long you wish to make the item.
Gauge – 16 stitches and approx. 20 rows to 10x10cm – your gauge will be flexible due to the open weave of the fabric, try not to stretch it when measuring.
To determine the amount of stitches depends on how loose you would like the item. We recommend measuring the widest part of you body this will cover, if you want it loose add on some centimeters (we added 10 cm to our measurement). Then half this number (you are only knitting one side at a time) and multiply by 1.6 – round your answer to the nearest even number. Cast on this many stitches.
Pattern
Once you have determined how many stitches to cast on, cast on leaving a 20-25cm tail for sewing up later.
Work these stitches in 2×2 ribbing (k2, p2 to end) for 8 rows.
Now switch to stockinette stitch – you will knit the right side rows (the side that will face outwards when wearing it) and you will purl the wrongside rows.
Once you have your desired length (or have used approx half the yarn you have if you are trying to do it from a set amount of yarn) we will make the neckline.
To make the neckline we will knit a quarter of the stitches, bind off the middle half, then knit the remaining quarter of the stitches. In our example we have 88 stitches in total, so we will knit 22, bind off 44 then knit 22 stitches to complete the row.
On the next row we will purl the first quarter of stitches, then we will cast on the same amount you bound off last row, then purl to the end.
Notes: If once complete the neckline is too wide you can sew up from the shoulders working inwards to give a better fit – this may be needed for larger sizes.
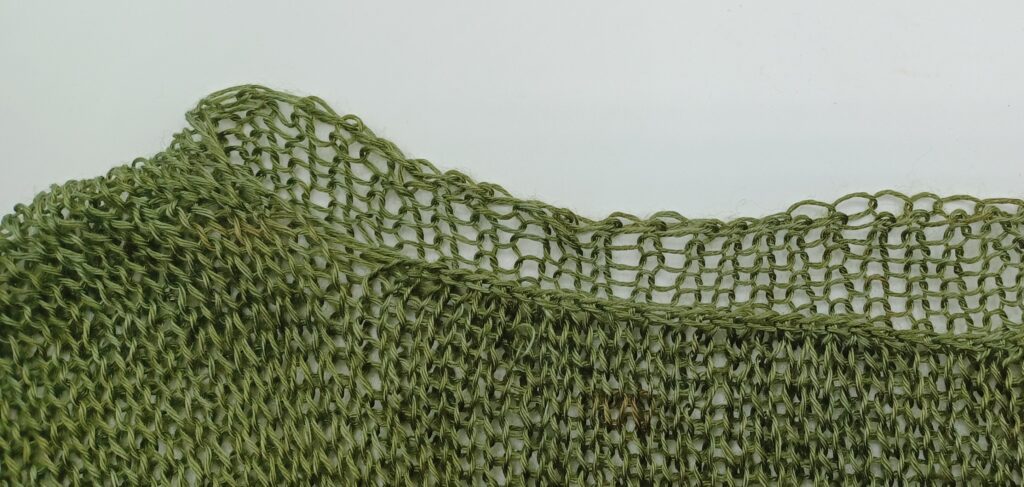
If you cast on more loosely than you bind off you may find your neckline is uneven as shown in the photo below. There are several ways to fix this if you find it bothers you, we tend to just wear the looser edge on the back side, but you can either cast on more tightly, change to a smaller needle for the cast on, or after you have finished the top you can pick up the neckline stitches, knit 1 row, then add an icord bind off for a lovely rounded finish.
Now you will continue to knit in stockinette stitch until you have reached your desired length, and change again to 2×2 ribbing for the last 8 rows. Now bind off loosely, leave a long tail for sewing up.
Now using the 2 long tails and mattress stitch (lots of videos on you tube for this) sew up the sides of your item, going as far as is comfortable for the armholes. the edges of the arm holes will curl in as shown below, this is intended.

Now – assuming you have used tencel, but this may apply to other fibres – put the item in the wash or rinse in water and while wet pull/reshape pulling vertically to give the stitches a chance to even out. Dry flat, and out of the reach of any cats who may make biscuits on it causing any pulls you see in our pictures!
You are now finished – unless you want to add the icord neck detail.