Phone Home Cowl
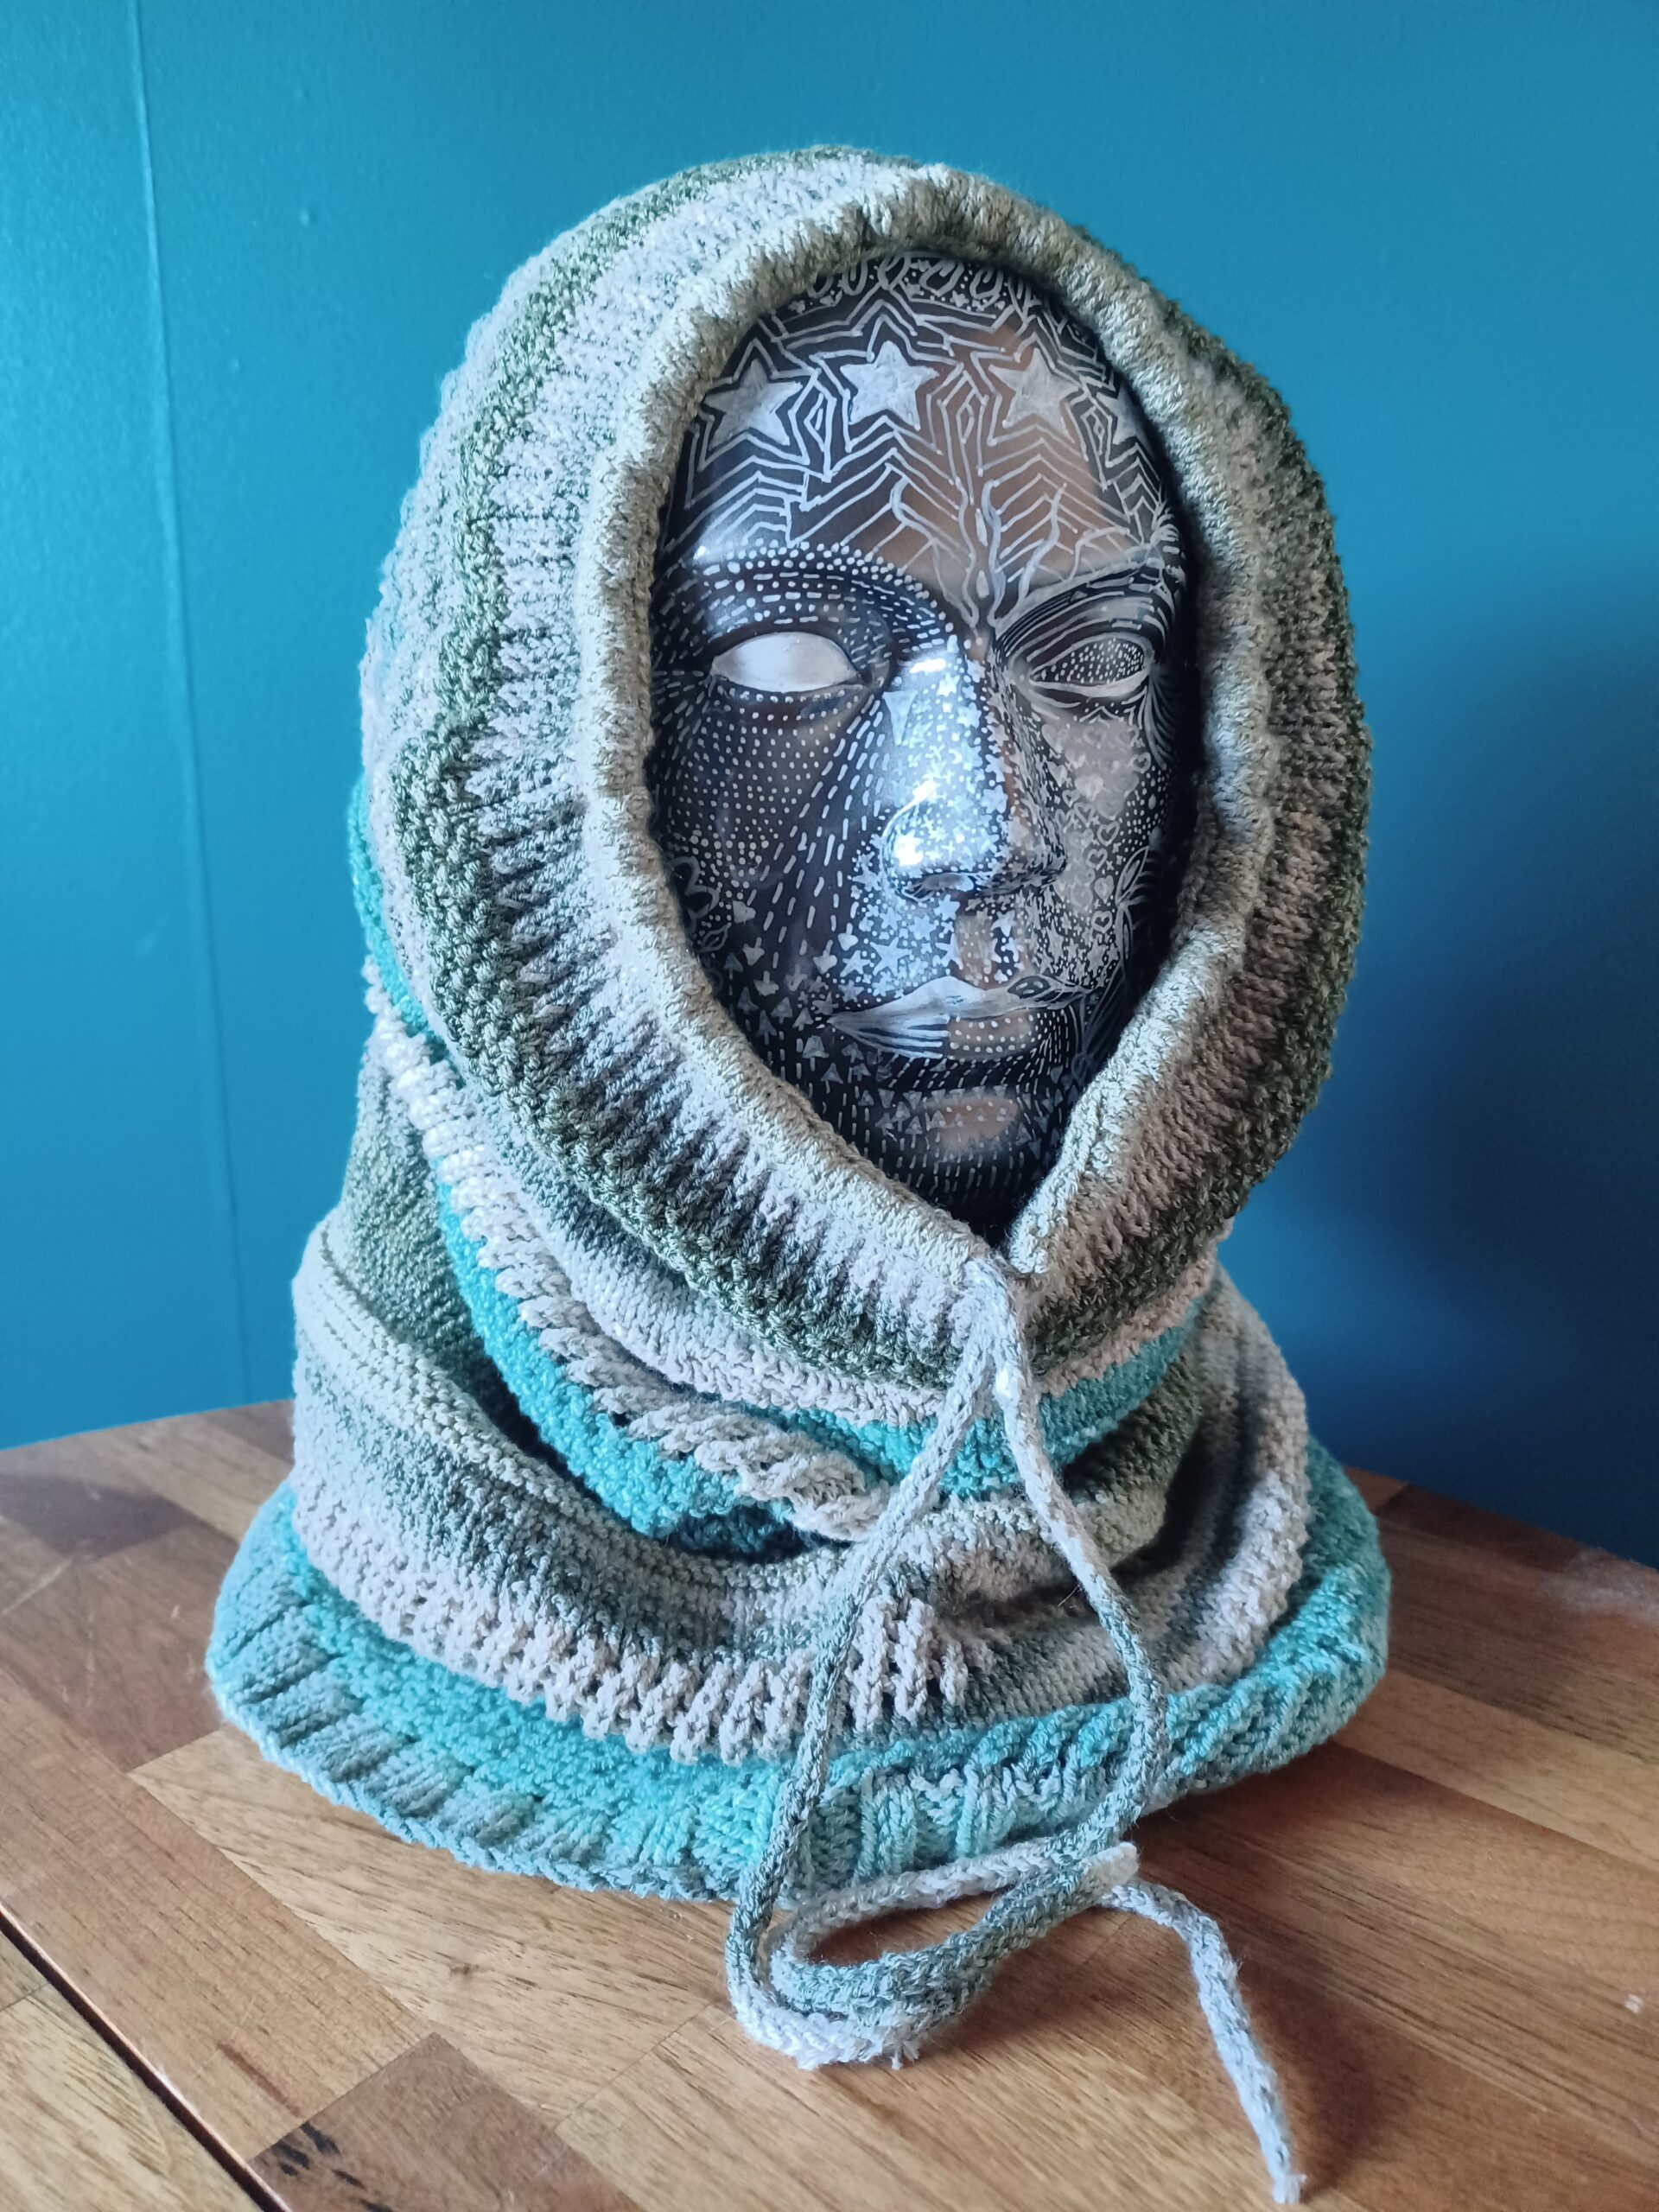
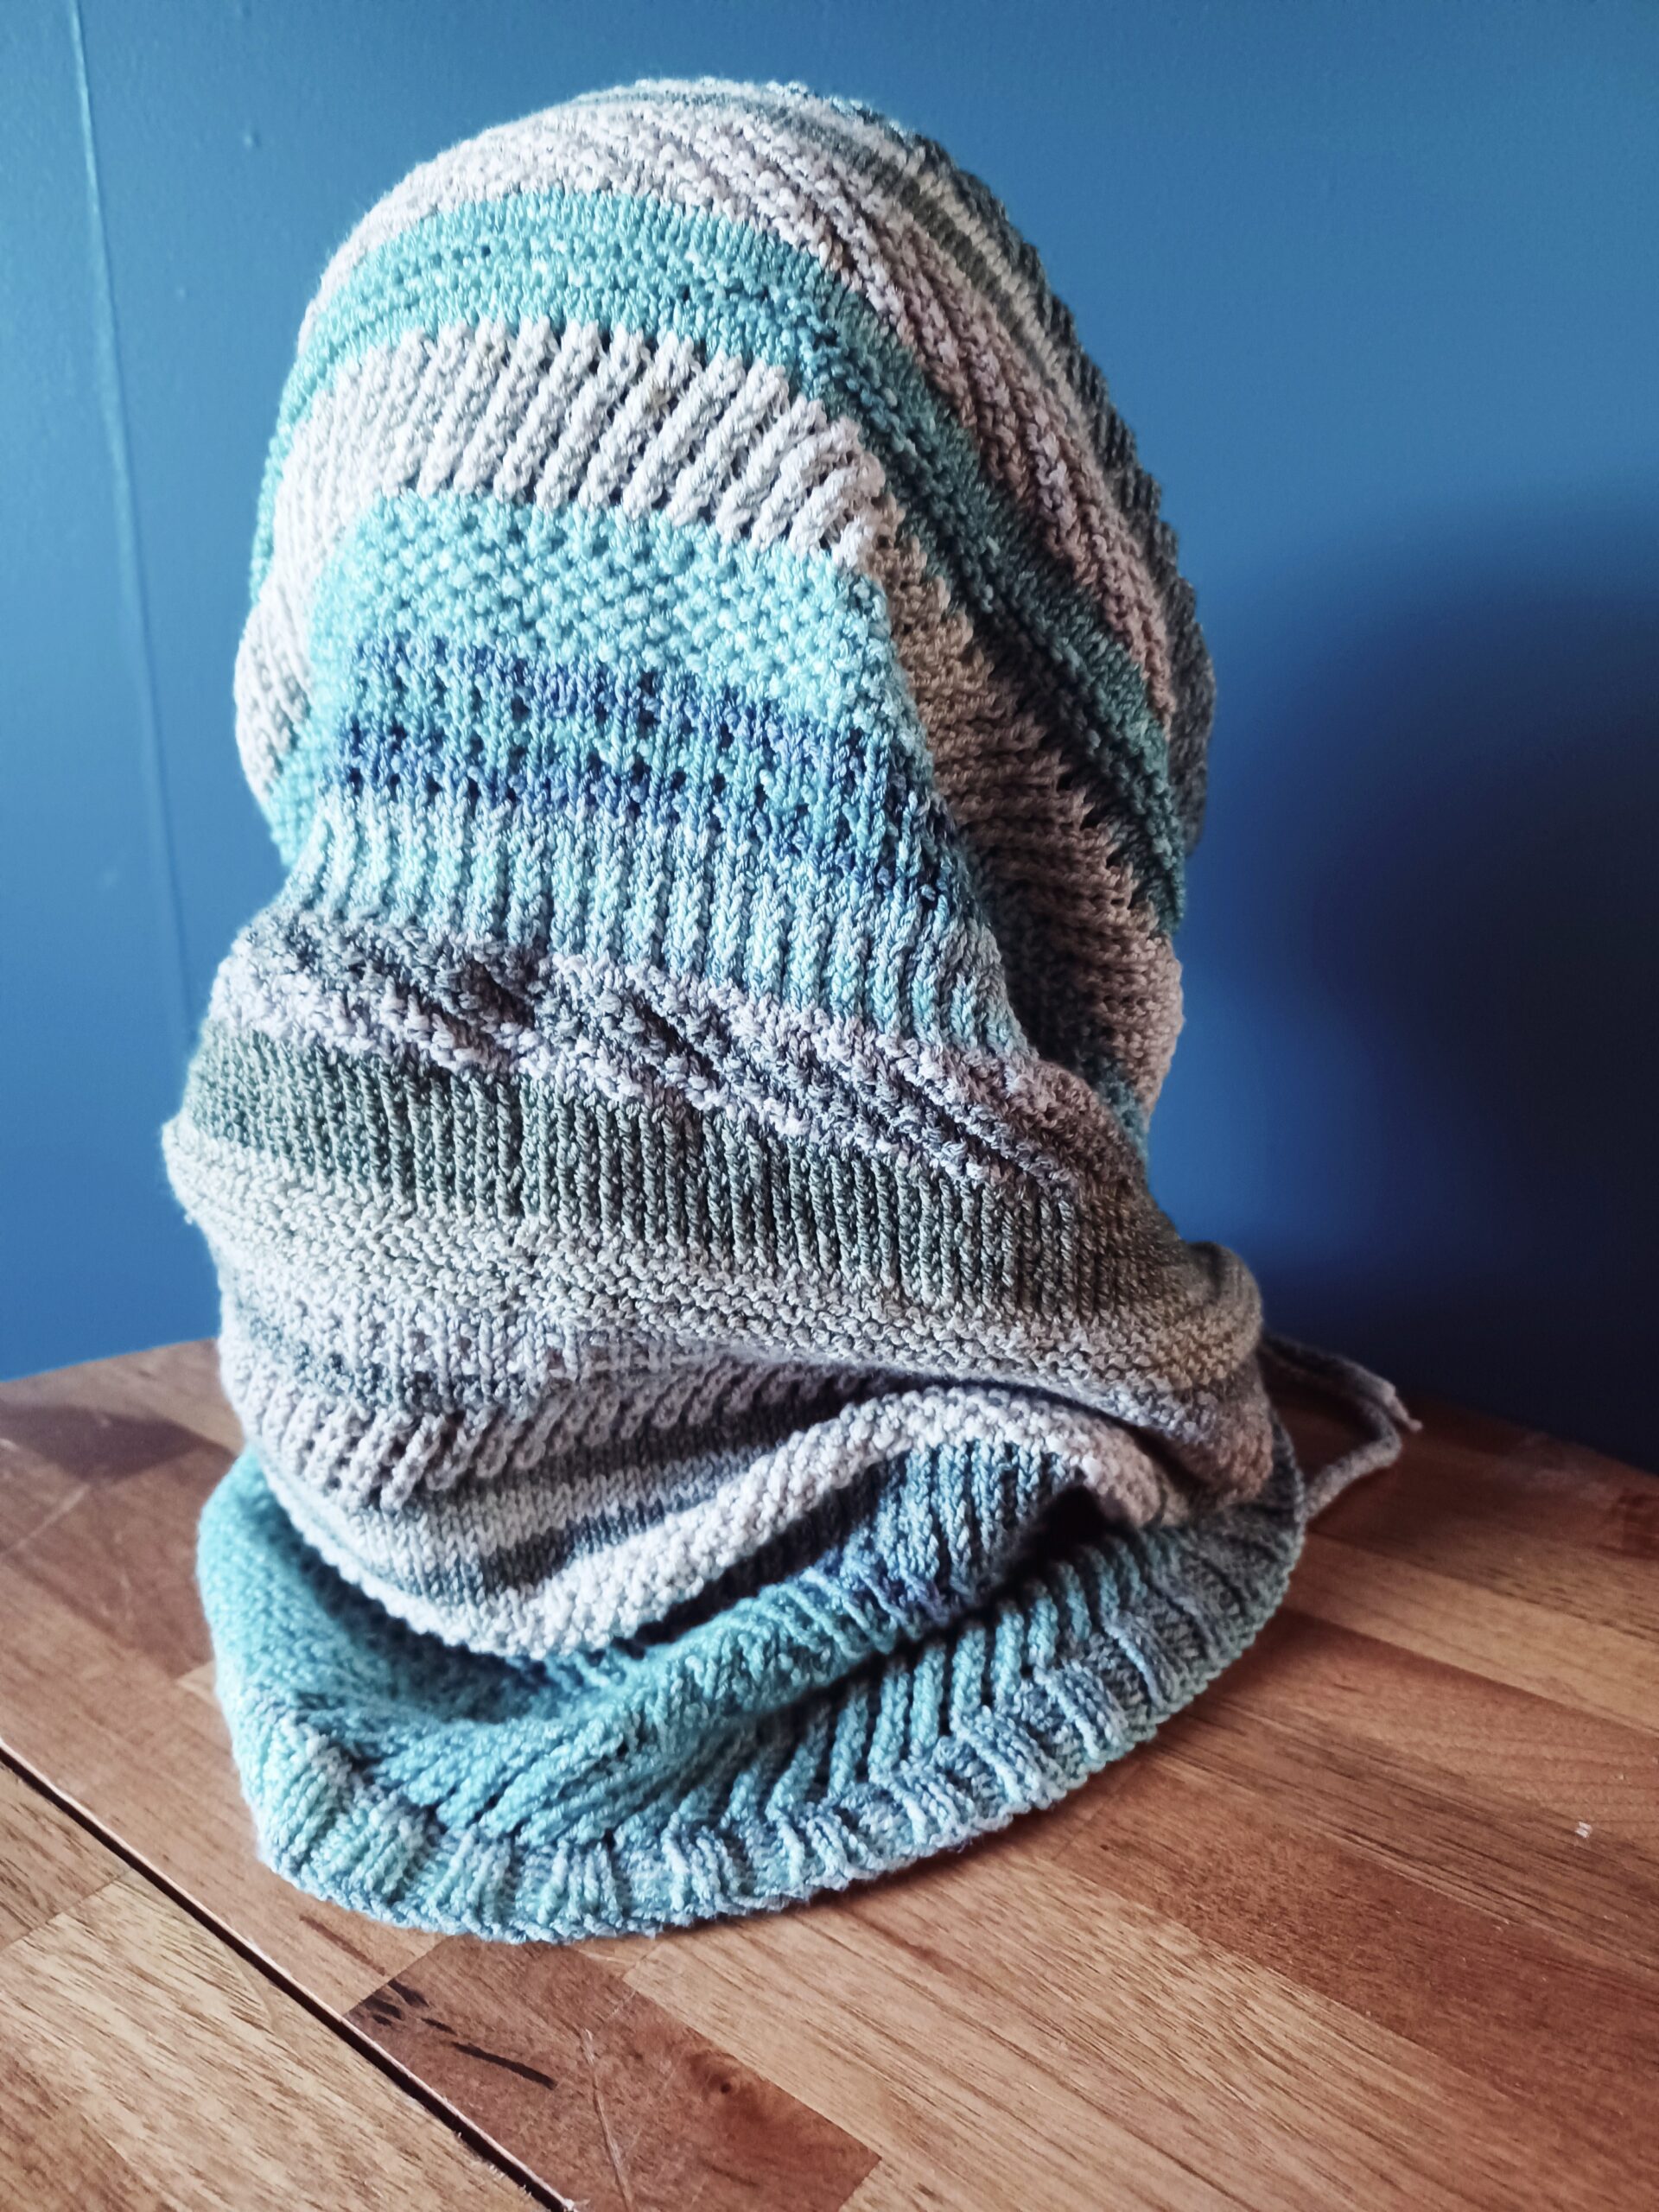
This cowl can be worn as a traditional cowl or you can use the drawstring to make it extra cosy and even pull it up to make a snood. Made from 24x 10g mini skeins its perfect for your advent yarns or to use with our sock yarn mini skeins available here – or you could just make it from one solid colour, you will need 240g total of sock yarn. Each section of the cowl uses just under 10g of sock yarn, and the I-cord is made using the leftover scraps.
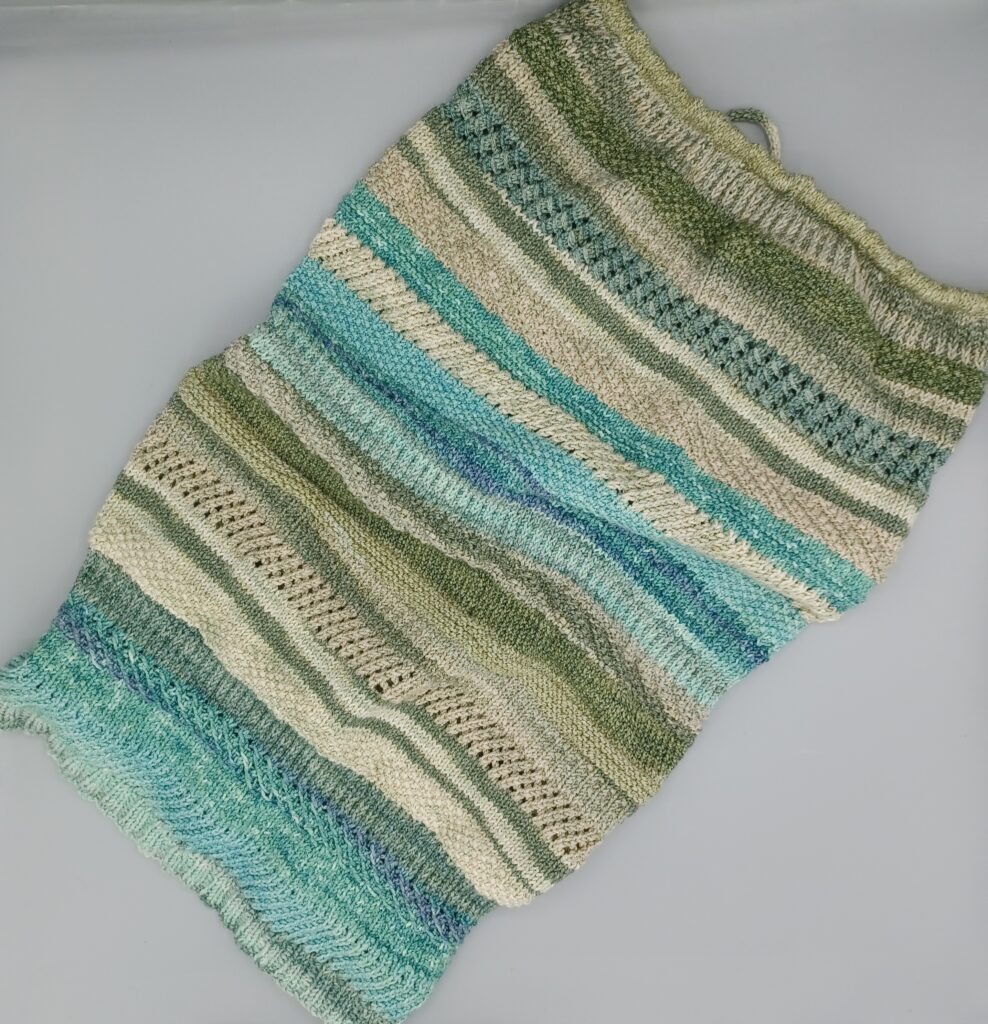
Finished Dimensions – 60cm circumference and 50cm long.
Gauge – on 4mm needles in stockinette stitch we get 20 stitches to 8cm across and 10 rows to 3cm down, however it is not vital that you get the same measurements exactly.
You will need
4mm circular needles (the circumference of the cowl is 60cm so if your circular needles are longer than this you will need to use the magic loop method)
For the I-cord you can use your 4mm circular needles however if you have 2x 4mm double pointed needles it will be quicker and easier. You can also make a I-cord using a crochet hook or an I-cord maker.
Notes about the pattern –
- We start with 172 stitches, occasionally we go to 171 stitches to make some of the pattern repeats work. Where we have 171 stitches we will note this at the end of the row, so if no stitch count is mentioned you should have 172 stitches.
- All slipped stitches are slipped as if to Purl
- We recommend weaving in your ends as you go, we use the Weavin Stephen method found here
- KEEP YOUR SCRAPS – you will need them for the I-cord.
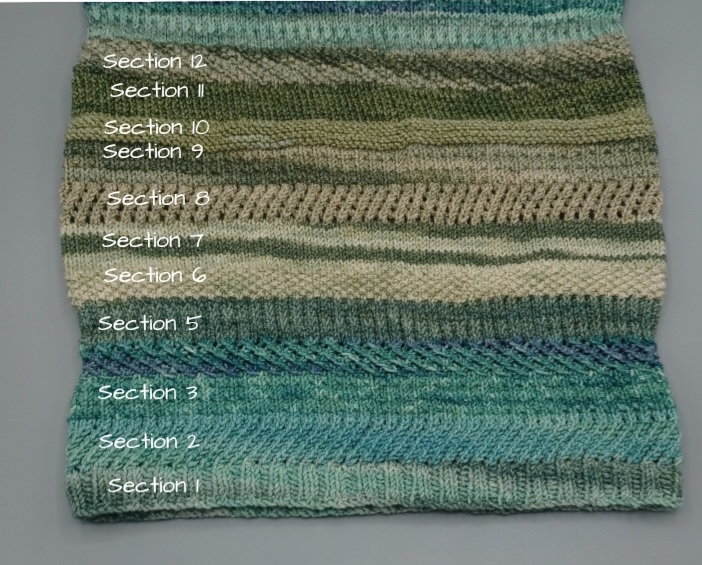
Section 1
Cast on 172 stitches
Now knit a 2×2 rib stitch for 6 rows, so Knit 2 stitches then Purl 2 stitches to the end of the row and repeat for 5 more rows so you have made 6 rows in total.
Now Knit all stitches for 1 row and break the yarn.
Section 2
Join yarn 2
Do a Yarn Over then, Knit 2 stitches together and repeat this until the end of the row. We will do 8 rows of this pattern in total.
Now Knit 1 row. Break yarn.
Section 3
Join yarn 3.
Knit 1 row.
Knit 1, Purl 1 until end of row for 1 row.
Knit 2 rows.
Knit 1, Purl 1 until end of row for 1 row.
Knit 2 rows.
Knit 1, Purl 1 until end of row for 1 row.
Knit 1 row, break yarn.
Section 4
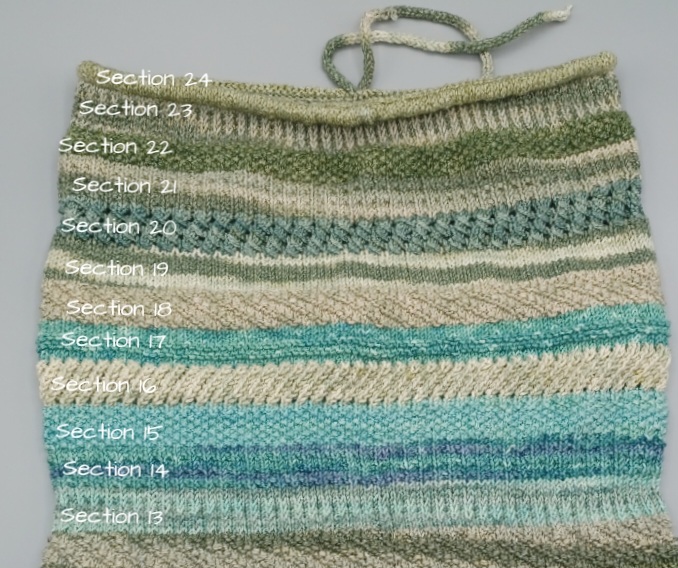
(Note: section 4 in our finished cowl was felt to be too difficult by our test knitters so we have replaced it, our photo is of section XX where we have also used this pattern, on the larger photos of the full cowl please ignore section 4)
Join yarn 4.
Knit 2 stitches together to give you 171 stitches, Knit to end of the row.
Now we will do a 2 row repeat.
Do a Yarn Over, slip 1 stitch, Knit 2 stitches, now pass the slipped stitch over the 2 knitted stitches (like you do when casting off) and repeat this until the end of the row. (171 stitches)
Knit 1 row. (171 stitches)
Now repeat the last 2 rows 3 times each (6 rows) so you have done 8 rows in total. (171 stitches)
Break yarn.
Section 5
Join yarn 5.
Knit 1 row.
On the next row Knit 1 stitch then Slip 1 stitch and repeat this until the end of the row.
Now repeat these rows 3 times each until you have done 8 rows in total.
Now knit 1 row, break yarn.
Section 6
Join yarn 6.
Knit 2 stitches together, then knit to the end of the row – you have 171 stitches.
Knit 1 then Purl 1 and repeat this until the end of the row, Knitting the last stitch. (171 stitches)
Purl 1 then Knit 1 and repeat to the end of the row, Purling the last stitch. (171 stitches)
Repeat the last 2 rows another 2 times each so you have knitted these rows 3 times each (6 rows) in total.
Knit a row until you get to the last stitch, in the last stitch knit one stitch into the front and one stitch into the back to incease your stitch count back up to 172 stitches ready to start the next section, break yarn.
Here’s a little video if you haven’t done a knit front and back of the stitch before.
Section 7
Join yarn 7.
Knit for 9 rows, break yarn.
Section 8
Join yarn 8.
Knit 1 row.
Do a Yarn over and then Knit 2 stitches together, repeat this until the end of the row.
Now repeat these 2 rows 3 times each (6 rows) so you have knitted 8 rows in total.
Knit 1 row and break yarn.
Section 9
This section is the same as section 3.
Join yarn 9.
Knit 1 row.
Knit 1, Purl 1 until end of row for 1 row.
Knit 2 rows.
Knit 1, Purl 1 until end of row for 1 row.
Knit 2 rows.
Knit 1, Purl 1 until end of row for 1 row.
Knit 1 row, break yarn.
Section 10
Join yarn 10.
Knit 2 rows.
Purl 1 row, making sure you pull the first stitch nice and tight to avoid a gap.
Purl another row.
Knit 1 row.
Purl 1 row, making sure you pull the first stitch nice and tight to avoid a gap.
Purl another row.
Knit 2 rows, break yarn.
Section 11
Join yarn 11.
Knit 9 rows but knit through the back of the loop, break yarn.
Section 12
Join yarn 12.
Knit 2 stitches together, then Knit to the end of the row, you have 171 stitches. You will have 171 stitches for every row in this section.
This sections will seem more complicated than it is – you are just going to Knit 2 stitches then Purl 2 stitches for 8 rows, however because you now have 1 stitch less this will make the pattern look like a sprial instead of a rib pattern. Written out it looks like this –
Knit 2, Purl 2 to last 3 stitches, Knit 2 then Purl 1.
Purl 1 stitch. Now Knit 2 then Purl 2 to the last 2 stitches, Knit 2.
Purl 2, Knit 2 until the last 3 stitches, Purl 2 then Knit 1.
Knit 1 stitch. Purl 2 then Knit 2 until then last 2 stitches, Purl 2 stitches.
Repeat these 4 rows. Break yarn.
Section 13
Join yarn 13.
Knit front and back into the first stitch to increase your stitches back to 172 stitches, knit to the end of the row.
Knit 1 stitch then Slip 1 stitch, repeat to the end of the row.
Knit 1 row.
Repeat these last 2 rows another 3 times each (6 rows) so you have knitted 8 rows total of this repeat.
Break yarn.
Section 14
This is the same as sections 3 and 9.
Join yarn 14.
Knit 1 row.
Knit 1, Purl 1 until end of row for 1 row.
Knit 2 rows.
Knit 1, Purl 1 until end of row for 1 row.
Knit 2 rows.
Knit 1, Purl 1 until end of row for 1 row.
Knit 1 row, break yarn.
Section 15
Join yarn 15.
Knit 2 stitches together to give you 171 stitches, then knit to the end.
Now for a 2 row repeat to give you Moss Stitch.
Knit 1 stitch then Purl 1 stitch, repeat to the last stitch and Knit the last stitch (171 stitches)
Purl 1 stitch then Knit 1 stitch, repeat to the last stitch and Purl the last stitch (171 stitches)
Repeat these 2 rows a further 3 times each (6 rows) so you have done 8 rows in total of Moss Stitch. Break yarn.
Section 16
Knit front and back of first stitch to give you 172 stitches, knit to end of the row.
Do a Yarn over , then Knit 2 stitches together, repeat this to the end of the row.
Now repeat this row 6 more times.
Section 17
Join yarn 17.
Knit 3 rows.
Purl 1 row.
Knit 1 row.
Purl 1 row.
Knit 3 rows. Break yarn.
Section 18
This is a repeat of section 12.
Join yarn 18.
Knit 2 stitches together, then Knit to the end of the row, you have 171 stitches. You will have 171 stitches for every row in this section.
This sections will seem more complicated than it is – you are just going to Knit 2 stitches then Purl 2 stitches for 8 rows, however because you now have 1 stitch less this will make the pattern look like a sprial instead of a rib pattern. Written out it looks like this –
Knit 2, Purl 2 to last 3 stitches, Knit 2 then Purl 1.
Purl 1 stitch. Now Knit 2 then Purl 2 to the last 2 stitches, Knit 2.
Purl 2, Knit 2 until the last 3 stitches, Purl 2 then Knit 1.
Knit 1 stitch. Purl 2 then Knit 2 until then last 2 stitches, Purl 2 stitches.
Repeat these 4 rows. Break yarn.
Section 19
Join yarn 19.
Knit into front and back of the first stitch to bring your stitches to 172, Knit to the end of the row.
Knit 8 rows.
Section 20
This is the same as section 4.
Join yarn 20.
Knit 2 stitches together to give you 171 stitches, Knit to end of the row.
Now we will do a 2 row repeat.
Do a Yarn Over, slip 1 stitch, Knit 2 stitches, now pass the slipped stitch over the 2 knitted stitches (like you do when casting off) and repeat this until the end of the row. (171 stitches)
Knit 1 row. (171 stitches)
Now repeat the last 2 rows 3 times each (6 rows) so you have done 8 rows in total. (171 stitches)
Break yarn.
Section 21
This is the same as section 3, but we increase 1 stitch in the first row.
Join yarn 21 and Knit into the front and back of the first stitch, then knit to the end of the row. (172 stitches)
Knit 1, Purl 1 until end of row for 1 row.
Knit 2 rows.
Knit 1, Purl 1 until end of row for 1 row.
Knit 2 rows.
Knit 1, Purl 1 until end of row for 1 row.
Knit 1 row, break yarn.
Section 22
This is the same as section 15.
Join yarn 22.
Knit 2 stitches together to give you 171 stitches, then knit to the end.
Now for a 2 row repeat to give you Moss Stitch.
Knit 1 stitch then Purl 1 stitch, repeat to the last stitch and Knit the last stitch (171 stitches)
Purl 1 stitch then Knit 1 stitch, repeat to the last stitch and Purl the last stitch (171 stitches)
Repeat these 2 rows a further 3 times each (6 rows) so you have done 8 rows in total of Moss Stitch. Break yarn.
Section 23
This is the same as section 13.
Join yarn 23.
Knit front and back into the first stitch to increase your stitches back to 172 stitches, knit to the end of the row.
Knit 1 stitch then Slip 1 stitch, repeat to the end of the row.
Knit 1 row.
Repeat these last 2 rows another 3 times each (6 rows) so you have knitted 8 rows total of this repeat.
Break yarn.
Before section 24
We have designed this pattern to have a folded brim/hem that you can insert an I-cord into to give the drawstring effect shown in the photos. At this point we recommend knitting the I-cord to ensure you have enough scraps to make it. If you don’t then you can use some of yarn 24 and don’t knit as many rows in the next section.
To knit and I-cord – Cast on 3 stitches, knit the 3 stitches, then slip your stitches back to the left hand needles and knit them again, repeat this process until you have an I-Cord the length you require. We recommend a minimum of 90cm.
If you have DPNS, You will knit 3 stitches then move the knitting to the other end of the needle instead of slipping the stitches – as shown here but using only 3 stitches.
Once you have made your I-cord progress to section 24.
Section 24
If you have not made a double hem/folded brim before we recommend having a look at this video which will explain how to do it.
Knit 7 rows. (Less if you used some of this yarn for your I-cord)
Now we are going to do a folded hem while casting off. Take your left needle and insert it into the bar of the stitch 6 rows below picking up this bar onto the needle, this is on the inside of your work. Tip – if you count the bars down from the live stitch each time this will ensure your hem is straight.
Now knit the bar you have picked up along with the next stitch on your left needle, this is knitting your current row together with the lower row to create a rolled tube which will be more evident once you have done this a few times. Do this again then you have 2 stitches on your right needle. Pass the back stitch over the front stitch to bind off 1 stitch. do this until the end of the row.
Don’t worry that your work will look like it is curling, once you have the I-cord in this will stop the curl.
Now break your yarn and thread the I-cord through this folded hem. Once you have pulle dit tight a few times the curl will be gone, we recommend on the first wash that you dry the item with the I-cord pulled a little tight to fully eliminate the curl.